Showing posts with label electronics. Show all posts

Sunday, 23 August 2015

Tamiya TBLE-02S mod for LiPo cut-off

In 2014 Tamiya changed their kit ESC to the TBLE-02S model. The speed controller features a low-voltage cut-off function, but it is set to 4.9V -- much too low for LiPo batteries that most RC enthusiasts use nowadays.

However, by adding a single resistor we can modify the cut-off voltage to a LiPo-safe 6.0V or 6.3V.


(Click on image to enlarge)

Sunday, 22 February 2015

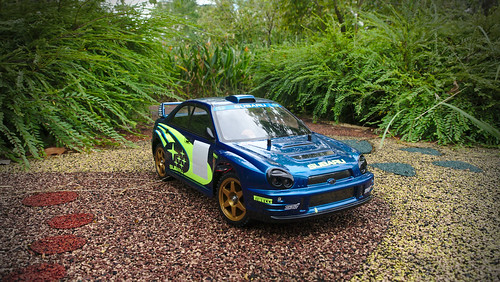
Bug-eyed Subaru

Recently we tried to sell a newly built Tamiya TT02 Lexus RC F Eneos Sustina. That did not go as well as planned; it took quite some time and we had to sell the car in pieces.

However, the photos I posted along with the ad led to someone contacting me, asking whether I'd be interested in painting a body shell and installing lights. My first client <smile>.

P1080541

Sunday, 28 December 2014

Build your own RC receiver

Its always fun learning something new. Ever since we got a 2.4 GHz RC system a few years ago, I wanted to understand how these things actually work. How do they send data over the air? What components are used?
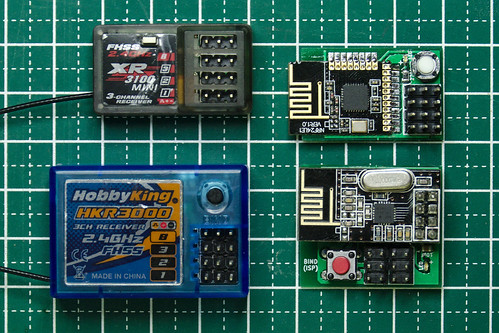
Well, in the last months we finally got around digging into it. And it turned out that it is a rather simple affair. So we built our own RC receivers.

RX DIY with HKR3000 and XR3100
The HobbyKing HKR3000 and XR3100 receivers along with two different versions of compatible, home-brew receivers.

Wednesday, 20 August 2014

DIY RC Light Controller with WS2812B

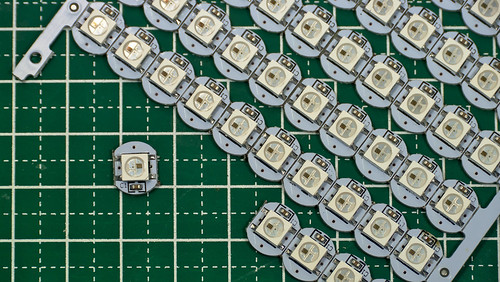
In recent years LEDs are appearing on the market that contain a controller chip. Currently the WS2812B is highly popular. It is a RGB LED that contains a simple chip inside. The LED is controlled through a single pin using a serial shift-register-like protocol. Multiple LEDs can be chained together; like a Christmas light.

P1070842
The WS2812B LED on a breakout-board for convenient mounting.
The WS2812B is an RGB LED with a built-in shift register like controller. It has 4 pins: GND, Vdd, Data-in and Data-out. With only three wires going from LED to LED, one can control each LEDs color and brigtness individually.

Using such LEDs makes wiring up a vehicle very easy: one only needs to run 3 wires from one LED to the next.

Friday, 9 May 2014

Shorten your servo wires

Most servos and speed controllers come with a wire that is too long for the average RC car. The usual way to deal with this is to either make a spiral by tightly wrapping the wire around a pencil, or by carefully bundling the wire up and securing it with a zip-tie.

A better way, albeit requiring more effort, is to shorten the servo wire to the exact length needed. The unused length of wire is just ballast, and also restricts current flow.

This post shows you how to shorten servo wires.

Monday, 16 September 2013

Make your own RC Winch Controller

Want to control you 1/10 scale winch from your 3-channel RC system? Below you can find instructions to build the necessary controller!

DIY RC Light Controller update

It has been a while since be blogged about our Light controller. In the meantime we have equipped more than ten cars with our custom electronics.

In this post we describe the changes we did along the way to the electronics and the firmware.

Saturday, 24 August 2013

Tamiya TEU-104BK mod for LiPo cut-off

Many Tamiya kits available on sale today still come with the TEU-104BK ESC. This ESC is perfectly fine for running brushed motors, but does not contain a BEC and its low voltage cut-off is too low for LiPo batteries.

The missing BEC is easily dealt with: either use "high voltage" compatible servo and receiver, or a cheap external BEC.

Fortunately it is also easy to modify the ESC to have a LiPo compatible voltage cut-off -- assuming you are able to solder a tiny surface-mount resistor.

Thursday, 7 March 2013

RC electronics Part 5 - Drift car power consumption

In part 5 we look at the electric power consumption of a 1/10 scale 4WD drift car.

The test subject is our Tamiya TT01D. We obtained the car second hand quite a while ago. It was originally an Expert Built set but has been substantially modified by the previous owner. It has the obligatory aluminium propeller shaft, a carbon fiber upper deck, a front one-way differential, sway bars, and a HobbyWing EZRun 60A brushless system with a 5.5T motor. The tires are well-worn HPI T-Drift. A 4600mAh 2S 30C LiPo provided energy for the car.

Monday, 4 March 2013

RC electronics Part 4 - Full metal scale Land Rover

The LANE Boys residence currently hosts a very special scale truck for light installation: a custom built full metal Land Rover Series 2 SWB. A good opportunity to see how much energy is needed to run such a RC car.

20130222-2049-08

Wednesday, 20 February 2013

RC electronics Part 1 - Tenth scale 4WD Buggy power consumption

When it comes to RC electronics there is not a lot of technical information available. Not many RC enthusiasts are experts in electronics and the manufacturers only provide very few data-points for their products.

Recently I got the opportunity to acquire a second-hand Eagle Tree Systems eLogger. This device can measure battery voltage, current draw, motor RPM, temperature and throttle input while you are driving your vehicle.

My first target was our 1/10 scale buggy. A Tamiya DB01 Durga: belt driven 4WD, running a sensored 10.5T Turnigy TrackStar motor with a 60A Hobbyking X-Car ESC. The buggy is geared with a 23T pinion on the 97T spur, giving a final drive ratio (FDR) of 8.13. Power was supplied by a LPR 2S LiPo rated 4600mAh 30C.

Monday, 11 February 2013

2.4 GHz receiver antenna repair

Notice something missing?

RX FS-GR3C case

Yes, the antenna has been cleanly ripped out of this poor receiver. Time to get out the soldering iron...

Thursday, 7 February 2013

HobbyKing HK-310 throttle return mechanism repair

Can you spot the problem with the throttle trigger in the following picture?

If you look carefully, you can see that the throttle trigger on the right transmitter is slightly depressed towards the grip. This is due to a fault in the mechanism that returns the throttle trigger to the centre when you release it.

Fortunately it is not difficult to fix this issue.

Wednesday, 30 January 2013

DIY RC Light controller pre-processor miniaturization

This blog post is a follow-up on "Pre-processor for the DIY RC Light controller"

It did not take long until it became necessary to shrink down the pre-processor for my DIY light controller.

P1260534

The HobbyKing HK-GT2R receiver is significantly smaller than the HKR3000 the LANE Boys are using, especially in height. No way an old-fashioned micro-controller in a DIP (Dual Inline Plastic) package can fit in there!

We need to solve this...

Tuesday, 25 December 2012

Pre-processor for the DIY RC Light controller

For my Tamiya XR311 I needed one of my DIY RC Light Controllers. If you are not familiar with it, please refer to my blog post: DIY car light controller for 3-channel RC

The XR311 is a small car and does not have any lights attached to the chassis, only to the body. So there was no need to have a full blown light controller on the chassis like in our Dingo, but I still wanted the convenience of having only a single servo extension wire between the chassis and body.

The HobbyKing HK-310 radio system I am using does unfortunately not have a PPM output on the signal pin of the battery connector as some receivers do, so this route was out of the question.

So I came up with the following solution: use a stripped down light controller in the chassis, serving as kind of pre-processor for the steering, throttle and Channel 3 signals. Since only one chip is needed for this function, why not add it directly into the receiver?

P1260091

Monday, 30 July 2012

DIY car light controller for 3-channel RC

Light systems for RC cars are available for relatively little money. But for our Dingo I wanted something custom, something special. So I made my own.

The goal was to be able to control the lights from a simple 3-channel RC car radio controller, such as the HobbyKing HK-310 or the FlySky GT3B -- both of which we own.

The following functions have been implemented:

  • Parking, Low-beam, Fog lamps and High-beam can be switched on/off using CH3
  • Brake and Reverse lights are automatically controlled by monitoring the throttle channel
  • Indicators only come on when you want to. You have to stay in neutral for 1 seconds, then hold the steering left/right for one second before they engage. This way normal driving does not trigger the indicators for more realism.
  • Hazard lights can be switched on/off using CH3
  • Programmable servo output designed to drive a steering wheel or a figures head

This video shows the functionality of the light controller: