After long consideration, the LANE Boys finally got a 3D printer. One of the applications we had in mind is printing custom light buckets for RC cars. The first results are very promising.

After long consideration, the LANE Boys finally got a 3D printer. One of the applications we had in mind is printing custom light buckets for RC cars. The first results are very promising.
In recent years LEDs are appearing on the market that contain a controller chip. Currently the WS2812B is highly popular. It is a RGB LED that contains a simple chip inside. The LED is controlled through a single pin using a serial shift-register-like protocol. Multiple LEDs can be chained together; like a Christmas light.
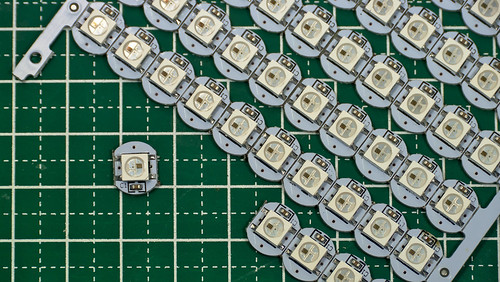
The WS2812B LED on a breakout-board for convenient mounting.
The WS2812B is an RGB LED with a built-in shift register like controller.
It has 4 pins: GND, Vdd, Data-in and Data-out. With only three wires going
from LED to LED, one can control each LEDs color and brigtness individually.
Using such LEDs makes wiring up a vehicle very easy: one only needs to run 3 wires from one LED to the next.
We are currently evaluating the popular shift-register programmable LEDs of type WS2812B and PL9823 for use in our DIY RC car light controller.
The PL9823 is of particular interest to us as they are in the traditional 5mm dome type LED package and therefore can be installed easily in the light buckets that come with many 1/10 scale RC car body shells.
From a software point of view the PL9823 is compatible with the widely popular WS2812B, with the exception that the data format of the PL9823 is red-green-blue while the WS2812B requires green-red-blue.
The brightness of the PL9823 and the WS2812B seems comparable. However, a downside of the PL9823 is that even if it is not lighting up, it already consumes 7-8mA of current. In comparison, a WS2812B LED consumes less than 1mA when it is off. The 7-8mA is still acceptable for use in an RC car and won't hurt your run time much, but one still needs to take this into account when desiging a system around those LEDs.
The chart below shows the current used by the LEDs when set to white with different brightness values from 0 to 255 on the red, green and blue channels. The PL9823 current usage is ~8mA higher than the WS2812B at every level.

Happy RC-ing!
It has been a while since be blogged about our Light controller. In the meantime we have equipped more than ten cars with our custom electronics.
In this post we describe the changes we did along the way to the electronics and the firmware.
This blog post is a follow-up on "Pre-processor for the DIY RC Light controller"
It did not take long until it became necessary to shrink down the pre-processor for my DIY light controller.

The HobbyKing HK-GT2R receiver is significantly smaller than the HKR3000 the LANE Boys are using, especially in height. No way an old-fashioned micro-controller in a DIP (Dual Inline Plastic) package can fit in there!
We need to solve this...
For my Tamiya XR311 I needed one of my DIY RC Light Controllers. If you are not familiar with it, please refer to my blog post: DIY car light controller for 3-channel RC
The XR311 is a small car and does not have any lights attached to the chassis, only to the body. So there was no need to have a full blown light controller on the chassis like in our Dingo, but I still wanted the convenience of having only a single servo extension wire between the chassis and body.
The HobbyKing HK-310 radio system I am using does unfortunately not have a PPM output on the signal pin of the battery connector as some receivers do, so this route was out of the question.
So I came up with the following solution: use a stripped down light controller in the chassis, serving as kind of pre-processor for the steering, throttle and Channel 3 signals. Since only one chip is needed for this function, why not add it directly into the receiver?

Light systems for RC cars are available for relatively little money. But for our Dingo I wanted something custom, something special. So I made my own.
The goal was to be able to control the lights from a simple 3-channel RC car radio controller, such as the HobbyKing HK-310 or the FlySky GT3B -- both of which we own.
The following functions have been implemented:
This video shows the functionality of the light controller:
Since we joined the SG Crawlers on their trails the small Tiger Crawler didn't cut it anymore. So we bought an Axial SCX10 Dingo.
One thing that turned us off when we first saw the Dingo was the front area. The stickers of the grill and lights just looked wrong. That was definitely an area we needed to improve on ours.

