The LANE Boys recently acquired a 3D printer. Beside printing spare parts and accessories, why not print a body shell?
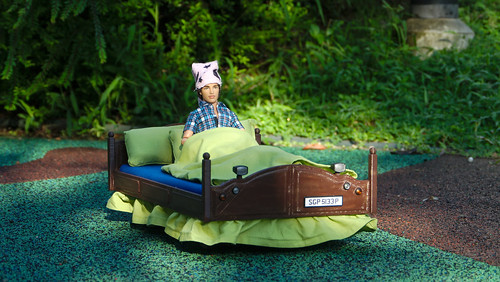
A few years ago we were amused by the motorized furniture creations of Edd China. So we decided to build this:
The LANE Boys recently acquired a 3D printer. Beside printing spare parts and accessories, why not print a body shell?
A few years ago we were amused by the motorized furniture creations of Edd China. So we decided to build this:
Tamiya has a good range of colours for polycarbonate named PS. But sometimes a RC project demands a specific tone that is not available. What to do?
Using our favourite search engine revealed that it is possible to spray other types of paint over PS-55 Flat Clear. We gave it a try and the results was excellent.

Last year we bought second hand Tamiya M01 and M02 cars. Both cars were in excellent condition. However, on both car the plate that secures the battery was missing.

After long consideration, the LANE Boys finally got a 3D printer. One of the applications we had in mind is printing custom light buckets for RC cars. The first results are very promising.

Recently we tried to sell a newly built Tamiya TT02 Lexus RC F Eneos Sustina. That did not go as well as planned; it took quite some time and we had to sell the car in pieces.
However, the photos I posted along with the ad led to someone contacting me, asking whether I'd be interested in painting a body shell and installing lights. My first client <smile>.
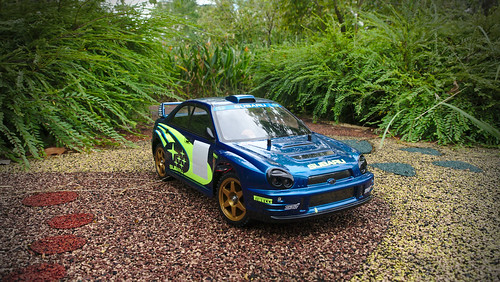
Its always fun learning something new. Ever since we got a 2.4 GHz RC system a few years ago, I wanted to understand how these things actually work. How do they send data over the air? What components are used?
Well, in the last months we finally got around digging into it. And it turned out that it is a rather simple affair. So we built our own RC receivers.
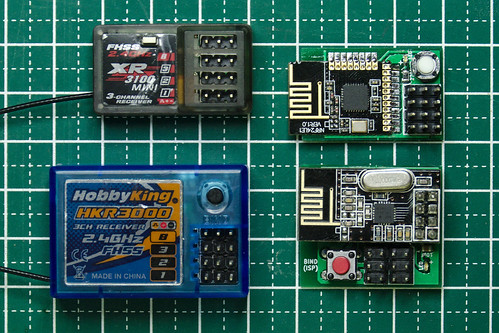
The HobbyKing HKR3000 and XR3100 receivers along with two different versions of compatible, home-brew receivers.
In recent years LEDs are appearing on the market that contain a controller chip. Currently the WS2812B is highly popular. It is a RGB LED that contains a simple chip inside. The LED is controlled through a single pin using a serial shift-register-like protocol. Multiple LEDs can be chained together; like a Christmas light.
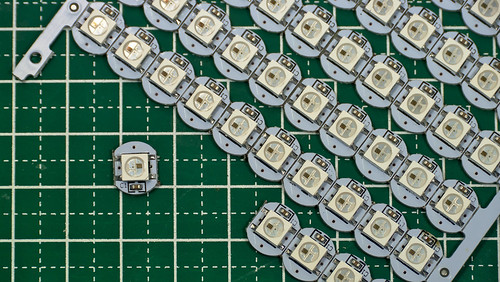
The WS2812B LED on a breakout-board for convenient mounting.
The WS2812B is an RGB LED with a built-in shift register like controller.
It has 4 pins: GND, Vdd, Data-in and Data-out. With only three wires going
from LED to LED, one can control each LEDs color and brigtness individually.
Using such LEDs makes wiring up a vehicle very easy: one only needs to run 3 wires from one LED to the next.
We are currently evaluating the popular shift-register programmable LEDs of type WS2812B and PL9823 for use in our DIY RC car light controller.
The PL9823 is of particular interest to us as they are in the traditional 5mm dome type LED package and therefore can be installed easily in the light buckets that come with many 1/10 scale RC car body shells.
From a software point of view the PL9823 is compatible with the widely popular WS2812B, with the exception that the data format of the PL9823 is red-green-blue while the WS2812B requires green-red-blue.
The brightness of the PL9823 and the WS2812B seems comparable. However, a downside of the PL9823 is that even if it is not lighting up, it already consumes 7-8mA of current. In comparison, a WS2812B LED consumes less than 1mA when it is off. The 7-8mA is still acceptable for use in an RC car and won't hurt your run time much, but one still needs to take this into account when desiging a system around those LEDs.
The chart below shows the current used by the LEDs when set to white with different brightness values from 0 to 255 on the red, green and blue channels. The PL9823 current usage is ~8mA higher than the WS2812B at every level.

Happy RC-ing!
Most servos and speed controllers come with a wire that is too long for the average RC car. The usual way to deal with this is to either make a spiral by tightly wrapping the wire around a pencil, or by carefully bundling the wire up and securing it with a zip-tie.
A better way, albeit requiring more effort, is to shorten the servo wire to the exact length needed. The unused length of wire is just ballast, and also restricts current flow.

This post shows you how to shorten servo wires.
One type of vehicle that was still missing from our RC fleet was a truck. Tamiya has very nice models; we liked the Globe Liner a lot, but the Mercedes delivery truck would have made more sense for us.
One day we were looking at the offers on eBay and found an old kit from the German manufacturer Robbe. A week later the auction ended and we had the pleasure to win it. Another two weeks went by until we could hold our latest wheeled toy in our hands:
A few weeks ago we bought a cheap second hand TT-01 because LANE Boys Snr. wanted to have a 10th scale touring car for relaxing in the local park. Along with the TT-01 came another box: A semi-vintage FF02 Alfa Romeo 156. The body shell had been used quite a bit and was heavily damaged. The chassis was incomplete, but in excellent condition. The front uprights were stripped where the king pin screws go in; turn buckles, servo mounts and a drive shaft were missing, but the rest of the vehicle looked like the car was never run before.
So we've set out to rebuild the car to its former glory.

Want to control you 1/10 scale winch from your 3-channel RC system? Below you can find instructions to build the necessary controller!
It has been a while since be blogged about our Light controller. In the meantime we have equipped more than ten cars with our custom electronics.
In this post we describe the changes we did along the way to the electronics and the firmware.
Many Tamiya kits available on sale today still come with the TEU-104BK ESC. This ESC is perfectly fine for running brushed motors, but does not contain a BEC and its low voltage cut-off is too low for LiPo batteries.

The missing BEC is easily dealt with: either use "high voltage" compatible servo and receiver, or a cheap external BEC.
Fortunately it is also easy to modify the ESC to have a LiPo compatible voltage cut-off -- assuming you are able to solder a tiny surface-mount resistor.
It took a while as other projects were interrupting, but now our Tamiya M1025 Hummer is finished and ready for the trail.

With the body in good shape it was time to rebuild the chassis of our Tamiya M1025 Hummer. Like all Tamiya kits one begins with the differentials.

With all parts stripped and cleaned, it is now time to build the vehicle up again. First we were dealing with the body.

Having finished our XR311, it is now time to get its brother, the Tamiya M1025 Hummer, back on the trail.

Our Tamiya XR311 is getting close to being finished. One of the last remaining jobs is painting the driver figure that comes with the kit.
Since I made the steering wheel in the XR311 movable I need the arms of the driver to follow the steering wheel. I first thought of adding hinges to the plastic, but abandoned the idea. I made hinges before for our Dingo and I am not pleased with how it turned out.
Studying how others solved the issue I found that real cloth provides the flexibility to keep the hands on the steering wheel. So I needed to make a suit for my driver.

In part 5 we look at the electric power consumption of a 1/10 scale 4WD drift car.
The test subject is our Tamiya TT01D. We obtained the car second hand quite a while ago. It was originally an Expert Built set but has been substantially modified by the previous owner. It has the obligatory aluminium propeller shaft, a carbon fiber upper deck, a front one-way differential, sway bars, and a HobbyWing EZRun 60A brushless system with a 5.5T motor. The tires are well-worn HPI T-Drift. A 4600mAh 2S 30C LiPo provided energy for the car.
